17th-century relief carving
Peter Follansbee demonstrates how to carve his 17th-century box using two common motifs: S-scrolls and lunettes.

Synopsis: Peter Follansbee demonstrates how to carve his 17th-century box using two common motifs: S-scrolls and lunettes. When you master these designs, you’ll have the skills to try others. These geometric patterns can be mastered using a basic set of gouges, a V-tool, a round mallet, and a compass
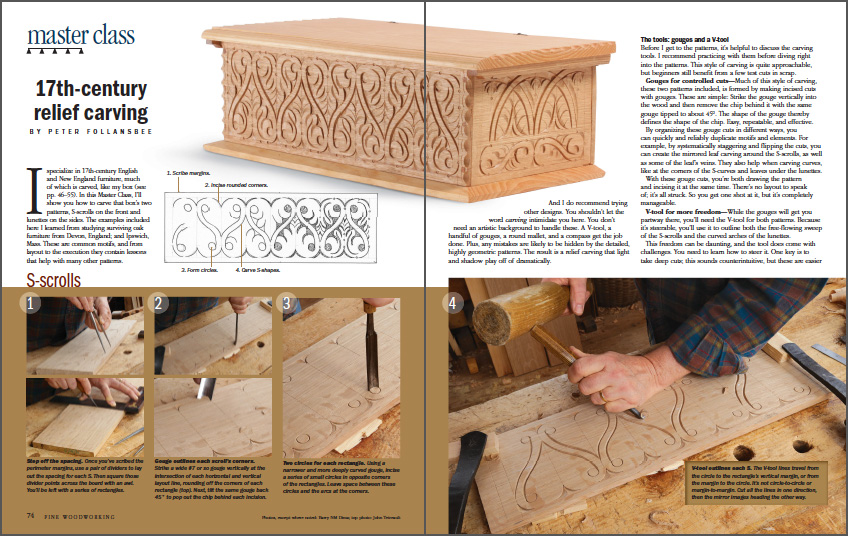
I specialize in 17th-century English and New England furniture, much of which is carved, like my box. In this Master Class, I’ll show you how to carve that box’s two patterns, S-scrolls on the front and lunettes on the sides. The examples included here I learned from studying surviving oak furniture from Devon, England; and Ipswich, Mass. These are common motifs, and from layout to the execution they contain lessons that help with many other patterns.
Video: Watch Peter Follansbee carve a shallow relief pattern
You didn’t get to visit Peter’s shop with Barry NM Dima and watch
him carve in person, but this is almost as good. Plus you can wear your pajamas.
And I do recommend trying other designs. You shouldn’t let the word carving intimidate you here. You don’t need an artistic background to handle these. A V-tool, a handful of gouges, a round mallet, and a compass get the job done. Plus, any mistakes are likely to be hidden by the detailed, highly geometric patterns. The result is a relief carving that light and shadow play off of dramatically.
The tools: gouges and a V-tool

Before I get to the patterns, it’s helpful to discuss the carving tools. I recommend practicing with them before diving right into the patterns. This style of carving is quite approachable, but beginners still benefit from a few test cuts in scrap.
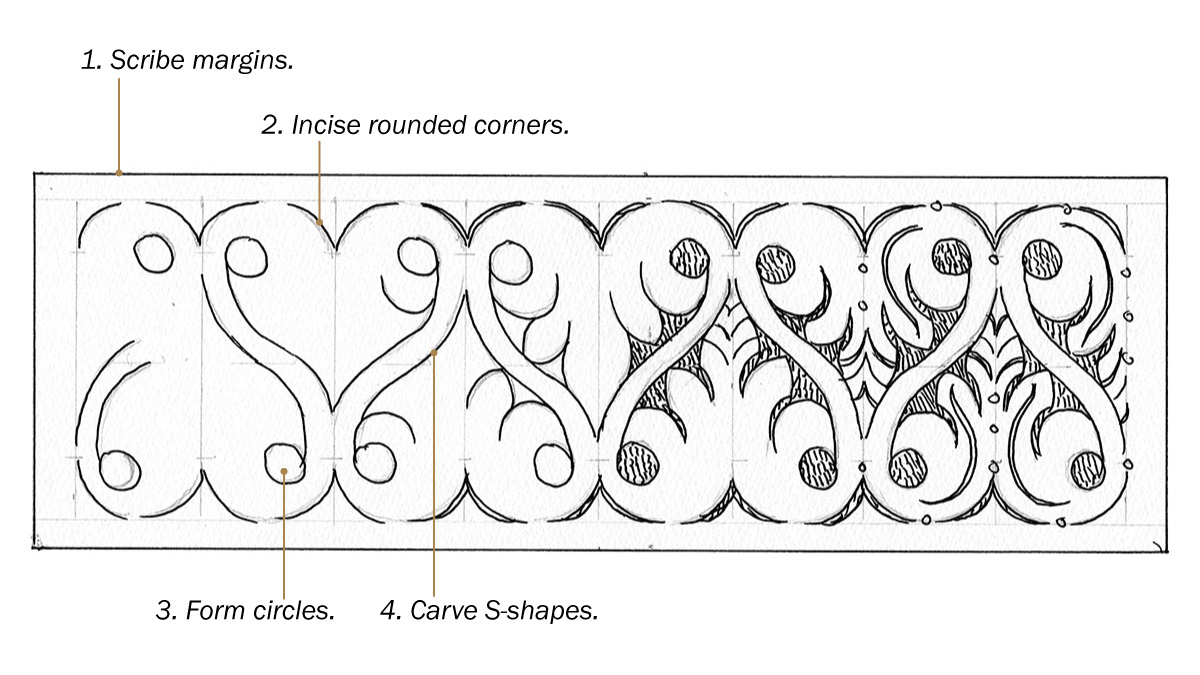
Gouges for controlled cuts—Much of this style of carving, these two patterns included, is formed by making incised cuts with gouges. These are simple: Strike the gouge vertically into the wood and then remove the chip behind it with the same gouge tipped to about 45°. The shape of the gouge thereby defines the shape of the chip. Easy, repeatable, and effective.
By organizing these gouge cuts in different ways, you can quickly and reliably duplicate motifs and elements. For example, by systematically staggering and flipping the cuts, you can create the mirrored leaf carving around the S-scrolls, as well as some of the leaf’s veins. They also help when carving curves, like at the corners of the S-curves and leaves under the lunettes.
With these gouge cuts, you’re both drawing the pattern and incising it at the same time. There’s no layout to speak of; it’s all struck. So you get one shot at it, but it’s completely manageable.
V-tool for more freedom—While the gouges will get you partway there, you’ll need the V-tool for both patterns. Because it’s steerable, you’ll use it to outline both the free-flowing sweep of the S-scrolls and the curved arches of the lunettes.
This freedom can be daunting, and the tool does come with challenges. You need to learn how to steer it. One key is to take deep cuts; this sounds counterintuitive, but these are easier to control than shallow ones. Deeper cuts also create a wider, more pronounced line, revealing more light and shadow. So cut as deep as you can, within reason, while still maintaining control. This means heavier strikes with your mallet, too. I keep my stance wide to maintain balance during these hits. Take practice cuts of varying depths and widths to find which gives you the lines you want.
My V-tool is 6mm wide with an approximately 50° angle.
From Fine Woodworking #287
To view the entire article, please click the View PDF button below.
 |
|
 |
|
 |










Log in or create an account to post a comment.
Sign up Log in