6 tips for dust-collection upgrades
Mike Farrington recently upgraded his entire dust-collection system. In this blog (and video) he shares some tips that he learned along the way.
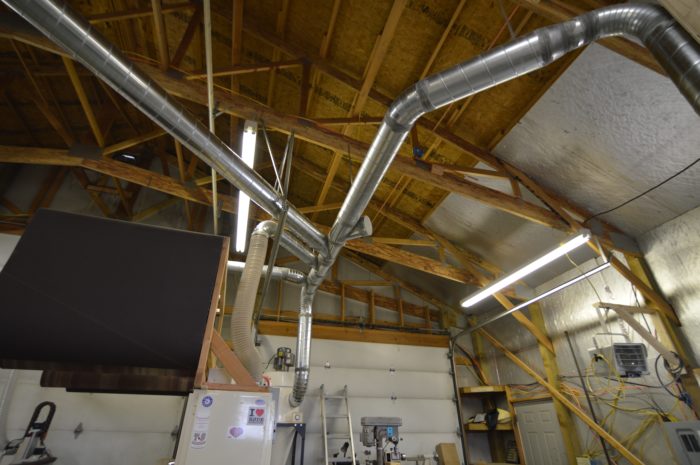
My workshop, AKA The Board Room, has recently undergone an upgrade to the dust-collection system. A few months back I found a great deal on a 5-hp cyclone dust collector on Craig’s List. I picked it up with the idea that when I had time I would install it. I found myself with some free time, so it was time to stop procrastinating. This is the fourth system I have installed over the years, so I have learned a few things along the way.

In my view dust collection is extremely under researched, especially for the small shop. I did way too much reading when preparing for this installation because I plan to use this system for many years, and I want it to function well. I read pretty much everything I could find, and I came to the conclusion that there was no way to fully and accurately calculate as well as understand each decision that goes into designing a dust-collection system. Which size pipe is best, how do I calculate the resistance of a duct system, what is the minimum horse power for my layout, how do I ensure I’m meeting the minimum CFM required at a particular tool? These are all important questions and the answers are hard to find. It’s even harder to find answers backed up by math.
Join Mike and dive into information overload
with all of the dust collection content on FWW!
So if you are looking to install a system in your shop and are confused by the information that’s out there, that makes two of us. In the end, I took the knowledge I picked up from reading and made the best decisions I could relative to my shop and layout. I also took the mindset that if it didn’t work as well as I wanted, I would just have to make changes.
Dust-collection tip 1:
This leads me to my first and most important tip, design a dust-collection system with flexibility in mind. New tools and shop layout changes are a part of the game.
Dust-collection tip 2:
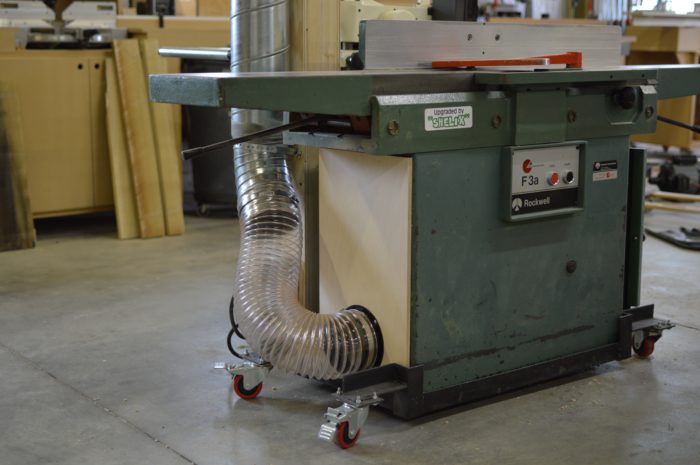
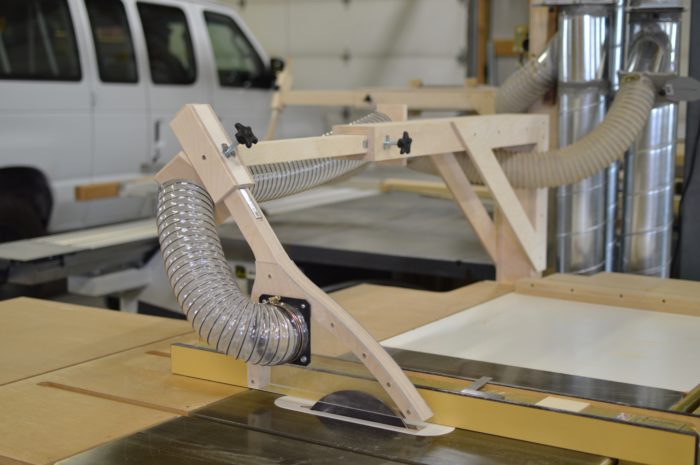
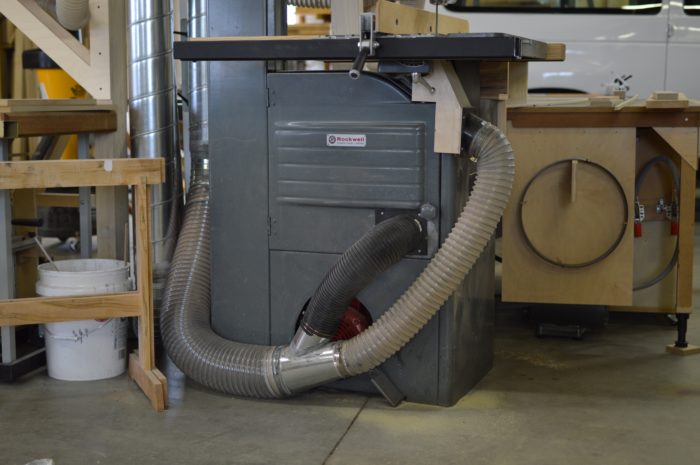
Buy or build shrouds and fixtures. I ended up building a pair of over arm dust-collectors for my two tablesaws. I could have bought them, but I thought it would be a fun challenge to make them and save a few bucks at the same time. Also, many older tools don’t have a place to attach a dust hose. On both my jointer and tablesaw, I made plywood covers and cut holes in them so I could attach a 6-in. collection hose.
Dust-collection tip 3:
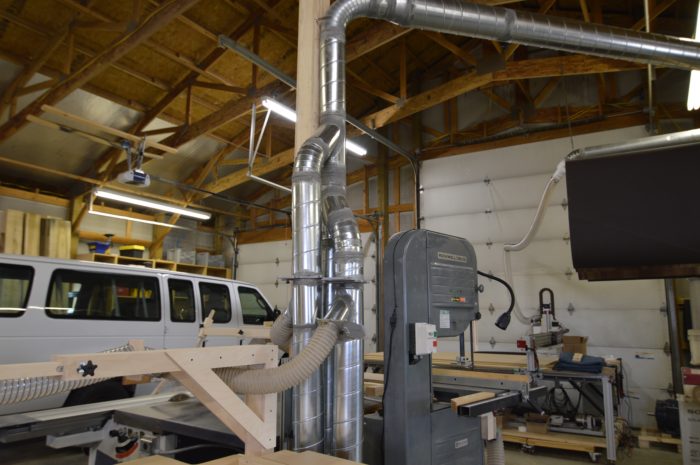
Buy your ducting from a local professional supplier. My last system was 6-in. PVC piping, and I purchased materials from a landscape supply house. This time I went with 8-in. and 6-in. spiral steel piping. I went to a local HVAC supplier and I was pleasantly surprised to find much lower prices than I could find online. The same was true when I bought the 6-in. PVC. Side note: I found that for pipe larger than 6 in., it was much more cost effective to go with spiral steel pipe vs. PVC; the 8-in. PVC fittings were very expensive.
Dust-collection tip 4:
If you are going to install a system with 6-in. duct work, I really think PVC is a great material. It’s easy to cut and assemble, and the way the fittings come together combined with the super-smooth inside of the pipe make for a great dust pipe. If you are concerned about static electricity sparking a fire, there are ways to ground PVC piping to mitigate that risk. In my opinion, though, it’s not the risk the internet has made it out to be.
 |
Dust-collection tip 5:
If using spiral or snap lock pipe, use duct sealant. For this installation I decided to try using a brushable duct sealant rather than duct tape. I’ve found that duct tape over time tends to work its way loose. Also, many times its very hard to get a good seal with tape in an awkward position like an inside corner. This time I went with sealant, and so far it’s been great. We will see if it holds up over time.
Dust-collection tip 6:
Locate tools as close to the dust collector as possible. Reducing the number of turns and feet of pipe is an easy way to keep the performance of a dust collector as close to its maximum as possible.
To close this one out, I don’t think it’s possible to create and install the perfect dust-collection system. All systems will have some amount of compromise. My system is the best I’ve done so far, but it’s far from perfect. I did the best I could with the materials I could afford and the space I have. I hope that we as woodworkers continue to improve our understanding of what good dust collection is and that tool manufacturers keep designing tools with better built-in collection. I have included links to a couple of videos I recently posted to my magnificent YouTube channel that cover my dust-collection installation as well as over arm dust-collection shrouds. Take a look if you are so inclined. Thank you for reading.
 |
|
 |
|
 |






Comments
Thanks for the video & information. I noticed you have some tight angles where the flex hose attaches to a machine (jointer, bandsaw, table saw blade shroud). My understanding is that tight angles reduce air flow. Did you find this to be an issue?
Great video. Love the Simpsons reference in the name caption :-)
I notice another Fine Woodworking article Dust Collection for the One-Man Shop #141–Mar/April 2000 Issue claiming that PVC pipe has 3 times the friction drop as steel pipe and the author conducted tests that supported the claim. Do you have any technical data supporting your claim that PVC pipe has less friction drop?
Nice system, but I'm a little surprised you didn't investigate (or maybe you rejected and just don't mention it?) Nordfab or other quick connect ductwork. Perhaps marginally more money? The ring-clamps with o-rings are not only air tight, but so simple to take apart and reassemble if you move/add/sell tools, move the whole shop etc. No pipe dope, not crimping, no pop rivets. Similarly, did you look at Gripple hangers? Foil HVAC tape? I dont know about spiral ducting, but the steel Nordfab ones are easily cut by drilling an access hole (twist bit), inserting a hand held jig saw (metal cutting blade), and rotating the pipe into the blade. No chop saw needed.
Log in or create an account to post a comment.
Sign up Log in