Easy Way to Glue up Panels
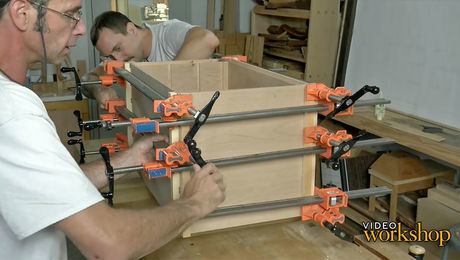
Learn how to use a simple spring joint to glue up boards and how to place your clamps to ensure a flat panel.
Videos in the Series
-
All About the North Bennet Street Toolbox
January 24, 2017
-
The History of the North Bennet Street Toolbox
January 24, 2017
-
Easy Way to Glue up Panels
January 24, 2017
-
Dovetailed Toolbox Case Needs Careful Layout
January 31, 2017
-
Hand-Cut Dovetails: Pins First
February 7, 2017
-
Hand-Cut Dovetails: Tails Second
February 14, 2017
-
Finessing the Fit of Case Dovetails
February 14, 2017
-
Cutting Joinery for the Toolbox Case
February 21, 2017
-
Gluing Up a Toolbox Case
February 28, 2017
-
Making Dividers for the Toobox
March 7, 2017
-
How to Attach Dividers to the Case
March 14, 2017
-
How to Make Dovetailed Drawer Partitions: Dado First
March 14, 2017
-
How to Make Dovetailed Drawer Partitions: Dovetail Second
March 14, 2017
-
Laying Out Dovetail Joinery for the Drawers
March 21, 2017
-
Cutting Half-Blind Dovetails for Drawers
March 28, 2017
-
How to Fit Drawers
April 4, 2017
-
Cutting Joinery for a Frame-and-Panel Door
April 11, 2017
-
Make a Raised Panel for a Door
April 11, 2017
-
How to Assemble a Raised-Panel Door
April 11, 2017
-
How to Hang the Door and Add a Lockset
April 18, 2017
-
How to Make a Shiplapped Back Panel
April 25, 2017












Comments
I am only happy that this video workshop is longer. thanks guys!
To Mike and the rest of the gang at FWW~ Thanks for bringing on Matt Wajda to the online presence. With some of the others leaving it's nice to have another extremely experienced furniture maker to show/teach new things. Matt (like Mike P) has an especially good teaching knack... and I'll be sure to watch every episode just to learn... even if I don't actually make the tool box. (but i might?)
will more than episode 1 be posted? or are they located somewhere else?
Yes! There are about twenty episodes coming. Usually one a week but since this build is so massive, there is a few weeks that I will be posting two or three episodes.
The more detail, the better. This is a great direction for you guys to be moving in. Thank you!!
I love the longer format! Keep going with this! I think for us who are relative beginners, the more detail the better! This spring joint video, for example showed me how to line up the panels in a way that I never knew! In a shorter format video, it might have been mentioned, but not demonstrated in that detail! Thanks, Matt!
I'm very excited about this series! I do have a question though, and please forgive my ignorance, but why not add dowels to the spring joint? I've been joining up boards this way for some time, so I'm just curious as to why not in this case? (Sorry for the pun too).
First time subscriber and really impressed with quality of episode 1. Matt looks to be a great teacher and I look forward to seeing how the series progresses.
Dowels add not strength. They can be helpful in alignment. However, to do so they need to be very accurately placed. As demonstrated, properly milled material, well jointed is not hard to align, especially with only two boards. Three is not bad either. A bench top is a different story, and dowels or other alignment techniques can be useful. When I learned the spring join I was trained to put the cauls supporting the boards at the end. As the join is closed very slowly you can adjust face alignment as the closed by downward pressure on one board or the other, starting at the ends, and working toward the middle. if there is any discrepancy.
I too appreciate the long format video, clear descriptions of the process, and excellent craftsmanship. I know it seems there is never time these days, but the "fast pace" of so much online and especially on TV seems to be the norm. Taking the time to fully explore the concepts is incredibly valuable. Well done!!
Apologies for the typos- seems no way to adjust.
And kudos to Matt for what I consider proper terminology -- "Housed tapered dovetails" and "half lap dovetails." Lance is certainly proud!
Looks like it will be a great series. I doubt I will be building it as a tool box, but can see its application for a number of other projects. I've attempted spring joints previously and have not been as successful as I would have liked. This episode helped tremendously.
I was also heartened to see Matt looking for his scraper after the glueup as all too often I've put a tool (or even my glasses!) down on the bench and then can't find it for a moment.
This may sound "rookie", but, what # plane are using to accomplish this? Thnx in advance
No rookie questions here! That's a #4 smoother.
Very nicely done. But for one thing. It always scares me when I see that uncovered table saw blade spinning around ready to blast away any little dropped board (or scraper). FWW always has a disclaimer saying that woodworking is dangerous. It is, and the table saw is number one danger. I recall a few years ago a story that a "shop guy" at a local lumber yard sliced off his thumb on the last day at work before his retirement. So, long experience doesn't insure safety. Use guards on your table saw blade. (Only exception, of course, is non-thru cuts, or dadoes. But in a dado, the board covers the blade.)
Nicely done video article on panel blue up. I would however suggest that mention be made that one should protect the bench surface from glue drops. I keep a roll of kraft paper at the end of assembly tables for this.
I've probably got 50 years woodworking on young Matt, never would I have deliberately induced stress into a joint. I don't ever remember anyone ever using dowels to "strengthen" a joint, only to align the surfaces- same for using biscuits. Matt's concern with joints at the end of the panel opening up, using yellow glue, they are going to move out of alignment anyways. I've seen many table tops that apparently were glued up with "spring joints", that the wood had split alongside the glue line , and some where the glue failed- whether it was yellow glue or hide glue- it made no difference. I have small wall cabinet that was made of glued up 3/8 oak strips using this method, when the humidity in the shop drops below 20%, the 2 joints open about 1/16", as the humidity rises, the gaps close back up. I am not saying Matt is wrong, I am just saying, that in my estimation, the labor expended to create a glued up panel with built in tension, no matter how slight, is not a a guarantee against joint failure. As far as I know, the thousands of glued up panels I have made in the past 50 years using flat, square jointed edges and dowels or later in life, biscuits are as sound to day as they were when I made them. The edges may misalign over time, but that is glue elasticity, and my failure to put a dowel closer to the end.
To user-6588623
If your boards are milled and jointed square and flat you don't need dowels to align the boards, they should align properly and create flat joints like the video showed.
As always, I enjoyed the first three videos of this workshop video. I have always been interested in NBSS and it's current or former students (Phil Lowe), as they have extensive training and they are a joy to watch. I'm really looking forward to the remainder videos for this workshop. Love what FWW is doing here.
Two questions from a woodworking beginner;
What is the purpose of a spring joint? Is it purely so you can use a single clamp? If so, why not buy more clamps and save the time from that hand planing?
Also, is there a vid that covers how to make your boards that evenly flat and square in the first place? I feel like I've missed a step. That's some accurate work just glossed over, thanks!
There are two schools of thought on it. One, it insures that the ends will always be tight, like Gary Rogowski covers here. The other being that it's easier to get the center of the joint flush because the ends are unable to move while clamping.
We didn't cover squaring and jointing boards because it's covered many other places here. I'll keep that in mind for next time though!
UKninja -- As Ben said -- one thought is it keep the ends of the joint better connected over time. I was told that is hogwash, and I believe it. The glue joint is stronger than the wood, if done right, so, huh? Makes no sense.
His second reason is what I learned -- easy to flush the joint from ends to the center as the joint is closed. The gap at the middle should be very small. Notice it did not require much pressure at all to close it up. But as it is closing when it is tight at the ends, the middle is still easily adjustable for flush.
Saving clamps is not a bad thing. Definitely can clamp effectively a longer joint with one clamp when using the spring joint.
You should remove the mill marks anyway; not much extra time required after some practice to put the spring in.
All that said, many people feel it is not a good solution, and go of straight boards. There is a LOT of great work out there without spring joints!
I'm surprised that PVA glue is the default at North Bennet. Matt works the squeeze-out all over the handsome cherry boards with his damp rag, then assures us that he'll have no problems in finishing. Hmmm -- thousands of frustrated woodworkers haven't enjoyed success with that approach. FW recently published a multi-page discourse on how to detail with PVA cleanup. But why would anyone bother with the whole business in the first place? Liquid hide glue, or the super-convenient "Old Brown Glue," offer excellent bonding, long open time for relaxed glue-ups, and zero issues down the line with finishing.
Also -- young Matt is asking for big trouble when he manipulates tape measure and panel on the saw top while the blade is spinning just a few inches away. Don't do it!
Also, I agree entirely with those commenters below who are skeptical about "springing" joints. This is one of those notions that sounds great on paper, a nice "inside secret" that one can pass along to green beginners (whilst burnishing one's master status in the process). But experience teaches that the fussy routine of springing actually contributes little or nothing to the soundness of the work. I've glued countless tops over several decades with straight jointing, and have had no problems whatever. As Garrett Hack has so rightly underscored, it's far more important to concentrate on eliminating all machine marks from the surfaces to be glued.. I see folks taking boards straight from the jointer to the clamps, but I'd never think of doing so.
Are there any dimensional drawing available? Would like to know how long, wide, thick everything is. Would love to try to follow along but need more info to do so.
I don’t think this would take away for the strength, do you think 5/8” thick stock (cherry) for Case work would compromise the structure?
Log in or create an account to post a comment.
Sign up Log in