Ep 11: Sizing the kumiko grid
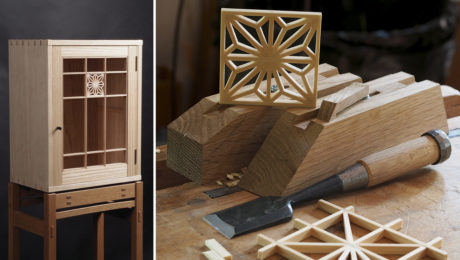
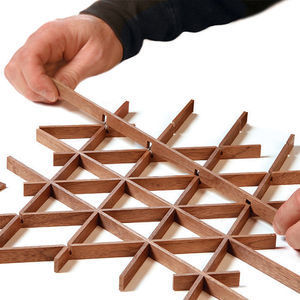
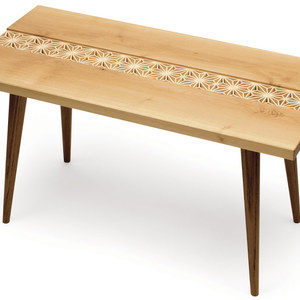
Using a tablesaw sled, Mike creates the grid for the decorative kumiko which will then tell him the dimensions of the door.
 |
|
 |
Videos in the Series
-
Ep 1: Hanging Wall Cabinet with Mike Pekovich–Intro
December 17, 2019
-
Ep 2: Laying Out and Rabbeting the Case
December 17, 2019
-
Ep 3: Dovetailing on the tablesaw
December 24, 2019
-
Ep 4: Hand-cut pins with a twist
December 31, 2019
-
Ep 5: Fitting the dovetails
January 7, 2020
-
Ep 6: Through mortise and tenon–Blue tape layout
January 14, 2020
-
Ep 7: Drilling and chopping mortises
January 21, 2020
-
Ep 8: Cutting the tenons
January 28, 2020
-
Ep 9: Prefinishing and gluing up the case
February 4, 2020
-
Ep 10a: Making the door frame
February 11, 2020
-
Ep 10b: Creating the door panel and dry-fitting
February 11, 2020
-
Ep 11: Sizing the kumiko grid
February 18, 2020
-
Ep 12: Door glue-up
February 25, 2020
-
Ep 13a: Fitting the door
March 3, 2020
-
Ep 13b: Mounting the door hinges
March 3, 2020
-
Ep 14: Door details
March 10, 2020
-
Ep 15a: Half-blind dovetailed drawer – part 1
March 17, 2020
-
Ep 15b: Half-blind dovetailed drawer – part 2
March 17, 2020
-
Ep 15c: Drawer grooves and glue-up
March 17, 2020
-
Ep 16: Shiplapped back boards
March 24, 2020
-
Ep 17: Fitting the drawer
March 31, 2020
-
Ep 18a: Kumiko–Asa No Ha pattern part 1
April 7, 2020
-
Ep 18b: Kumiko–Asa No Ha pattern part 2
April 7, 2020
-
Ep 18c: Trimming a kumiko panel to size
April 7, 2020
-
Ep 19: Simple shellac and wax finish
April 14, 2020
-
Ep 20a: Installing the shelf supports and hardware
April 21, 2020
-
Ep 20b: Installing a bullet catch–Conclusion
April 21, 2020








Comments
Kumiko on the table saw? Kumiko screams for hand tools.
Worry not, it's just for the grid.
Love this video workshop! Mike is so concise and precise in his explanations that I've been using some of his tips already on completely different projects!
That's the idea! I'm usually unlikely to build projects that we shoot, but I learn a ton from these masters that wind up being applied in everything I build!
A good video set and nice cabinet for sure. I like to finish up in a relaxed manner, sitting at the bench, laying out and cutting the Kumiko adds to the satisfaction of completing a piece such as this.
I'm pretty new to woodworking. I'm going to give this Hanging Wall Cabinet a shot. Is there any reason to NOT make this out of pine, or something cheaper than white oak. I'm sure I'll learn a ton (nice way of saying, I'm going to screw this up) and I'd rather not waste the extra $. Any other suggestions on wood species?
Pine would be fine I’m sure. Pine and softwoods can be frustrating though if your chisels and blades aren’t super sharp because they have a tendency to dent and crush and “fray”. Just a heads up. I can usually find a cheaper hardwood like Poplar or something that’s on special in “shorts” section of my supplier when I want to try something new or just stay on the cheaper side of things. Hope that helps.
The video is very helpful, but is also very flat, milky gray. Just a little color correction would give it much more dynamic range and make it less painful to watch.
I was just about to start a White Oak wall mounted whiskey cabinet. Love Mike's design aesthetic. definitely going to emulate this build for my project.
A popular wood for furniture is yellow pine, also called ponderosa pine. I made my bed out of it 30 years ago. It still looks great.
Video editor for 20+ years - As an instructional video, you really don't want lot of deep shadows and bright highlights that can obscure details (shadows) or blow them out (highlights), so sacrificing a bit of dynamic range for clarity is a good call. Of course, if you're making an artistic piece, that's different.
Nice job Ben.
not_enough_tools, As a video editor for 20+ years (me for nearly 30), you should know the difference between shadows and dynamic range. These videos don't sacrifice "a bit of dynamic range", they sacrifice a lot. Having details in shadows doesn't require flattening a video to the point of 1970s TV. Look at most of the videos on Fine Woodworking and you'll see that they look so much better, and show detail much, much better. I was only trying to give constructive criticism. Just look at the FW home page and compare this video with all the other images on the page. This video literally pales in comparison.
I've been paying attention to the subject. I've learned tons and am about to start this project myself. I'm going to look for some yellow pine (thanks jbarduhn).
With regards to the last couple of 'video quality' messages. I wonder if you're as critical of your own woodworking skills. The knowledge that is being given here is priceless and explained perfectly in my opinion. To focus and comment on video quality, in an open forum like this, is kinda silly I think. (I expect this comment will bring on the wrath of all the keyboard cowboys out there. Go ahead and spout off, I'm heading back to my table saw.)
Curious about the blade Mike is using in the tablesaw-- is this just a combo blade like a Forrest WWII or is it a flat-bottom box joint blade? BTW, absolutely love Mike's videos and calm instructional style! Thanks, Jim
Can you let me know the type of wood used for the Kumiko grid? Is it poplar?
I know the width is 1/2". Is the thickness 1/8"?
Log in or create an account to post a comment.
Sign up Log in