How to cut coves on the tablesaw
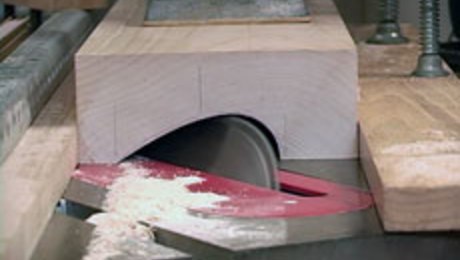
Instead of turning to a router or a shaper, Will Neptune produces various deep, wide coves using the tablesaw.

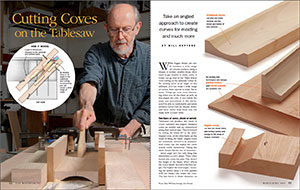
Synopsis: If your shop is like most and is not equipped with a shaper or molder, you need to get creative when cutting coves. A router will only get you so far. Will Neptune produces deeper, wider, and more varied coves using the tablesaw. Here he takes you through his straightforward process for setup, using two fences and several hold-downs to ensure this sometimes daunting tablesaw cut can be made with the utmost safety.
While bigger shops can easily produce a wide range of concave surfaces using a shaper or molder, smaller shops often need to get creative to make coves. A router can go only so far. That’s where cove cutting on the tablesaw comes in. By feeding stock at an angle on the tablesaw, you can create a wide range of curves, from narrow to wide, flat to steep. Things get even more interesting when you tilt the blade as well, as this angles the cove. If you follow the steps and precautions in this article, you’ll be able to comfortably and safely produce curves that are deeper, wider, and more varied than those you can make with a router table.

Two types of coves, plenty of variety
Tablesaws can produce two kinds of coves: standard and angled. Standard coves are simpler and are symmetrical along their vertical axes. They’re formed by setting the blade 90° to the table. Angled coves, on the other hand, are the result of tilting the blade. Angled coves are sometimes referred to as asymmetrical coves, but this makes the curve sound overly mysterious. Tilting the blade simply tilts the line of symmetry.
Arbor angle isn’t the only thing that determines a cove’s shape. Three other factors also come into play. First, there’s the height of the blade, which affects the cove’s depth. Second is the feed angle. The higher the feed angle—meaning the farther away it is from parallel with the blade—the wider the cove. The last factor is blade diameter, as smaller blades can produce tighter coves. Use a rough rip blade if possible, although a combination blade will do.
Cove Angle Calculator
A few quick keystrokes yield
tablesaw-blade and fence-angle settings
Straightforward setup ensures safety
While some people use jigs or even computer programs to help figure out their coving setups, I try to keep things simple. After drawing the cove on the stock, I set the height of the blade to the deepest point of the arc. To figure out my feed angle, I put the workpiece behind the blade and sight the blade’s arc against the drawn cove, angling the board until the width of the cove matches the width of the blade’s silhouette. That’s all you need to do for straight coves.
To view the entire article, please click the View PDF button below.
 |
|
 |
How to Cut Coves on the Tablesawwith Tom McKenna |
 |
Asymmetrical Coves on the Tablesawwith Stuart Sabol |


Log in or create an account to post a comment.
Sign up Log in