How to turn a round frame
Barrie Lynn Bryant turns round frames in medium density fiberboard, before covering the frame in gold leaf and paint.

Brought to you by:
This article, “How to turn a round frame,” by Barrie Lynn Bryant, is from the pages of American Woodturner and is brought to you by the American Association of Woodturners (AAW) in partnership with Fine Woodworking.
I turn tondo (round) frames in medium density fiberboard (MDF), knowing the entire frame will be covered in gold leaf and/or paint. Use a dust mask appropriately rated by NIOSH (National Institute for Occupational Safety and Health) for MDF dust. Here’s how I do it. It’s a simple and fun turning project.
 |
Barrie Lynn Bryant makes MDF shine by applying real gold leaf to his round frames. |  |
This article originally appeared in the August issue of American Woodturner, the Journal of the American Association of Woodturners. |
STEP 1: Mount MDF blank
 |
 |
I begin every frame with a full- or half-scale drawing on graph paper. I cut a square of MDF, mark the center, and draw both the frame’s inner “sight” edge and outer edges using a compass. I mount the tondo blank to a wood block securely attached to a faceplate, using screws driven from the front side of the tondo.
STEP 2: Preshape blank and mark feature lines

In preparation for turning, I cut off the square corners and measure and mark the sections to be turned.
STEP 3: Define inner sight edge
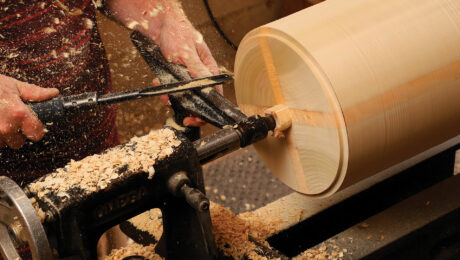
Begin defining the sight, or inner, edge, establishing the depths of the deepest cuts using a parting tool. Using a 1/16″ (1.5mm) drill bit, drill a depth-finder hole just beside the sight edge. You can then remove the bit from the drill and periodically insert it through the hole to determine depth of cut. A low, 1/8″ (3mm) thickness at the sight edge minimizes shadows falling across the artwork once installed in the frame.
 |
 |
STEP 4: Turn tondo features, sand
Use a 1/2″ (13mm) bowl gouge to form coves and to establish the outer edge details. Sand the cuts and details as needed.
 |
 |
STEP 5: Part off
Use a parting tool to remove the tondo from the lathe. Hand-cranking with the lathe off can help prevent tearing the MDF as you near the completion of the cut.
 |
 |
STEP 6: Mount artwork
The artwork is mounted within a rabbet attached to the back. Rabbet shapes and construction may vary, depending upon the shape of the artwork, the width of the face of the frame, and the depth of the rabbet in relation to the shape of the frame profile. A square rabbet (left) is the simplest for managing artwork and glazing. In some cases, a multi-sided rabbet can be constructed (right), but this complicates the glazing process.
 |
 |
If the artwork to be framed is round, then a circular rabbet can be made on the lathe, parted off, and then glued to the back of the tondo. To ensure the artwork will fit in the rabbet, make its inner edge diameter slightly larger than the diameter of the artwork. It is also possible to mount round artwork without a rabbet, simply by setting it within a turned recess in the back.
 |
 |
Photos courtesy of the American Association of Woodturners.











Log in or create an account to post a comment.
Sign up Log in