Future-proof drawer frame construction
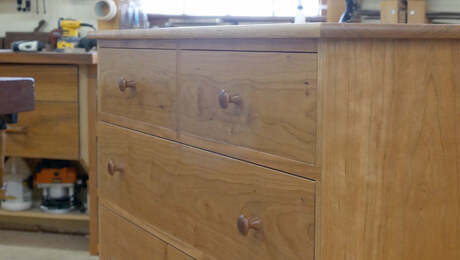
Having fixed many antiques, Tom McLaughlin constructs the Shaker-style dresser drawer runners in a way that will be durable but also repairable, should the need arise.
Sponsored by Lee Valley/Veritas
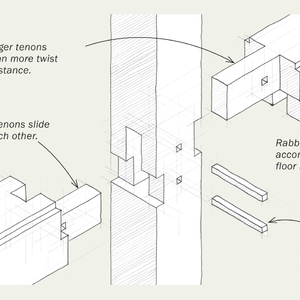
I use hard maple for my drawer runners. It allows the drawers to slide smoothly and resists wear. The runner tenons fit into the grooves in the front and back dividers, and the runners are anchored to the sides with two pre-drilled countersunk screws in the runner groove. The runners are set with a 1/16-in. gap to the front divider to allow for seasonal movement. The drawer runners are not glued to the sides, only screwed, to allow for seasonal wood movement and easier future repairs.
The top center drawer guide, fitted behind the top vertical divider, is glued in place with the tenon resting on top of the horizontal front divider while centered on the rear divider. It is attached in the rear with a washer-head screw, up through a slotted groove in the rear divider, which holds the drawer guide centered side to side but allows for seasonal movement front to back. The 1/4-in.-thick hard maple runner piece is screwed to the underside of the top center drawer guide to create center runners for the top two drawers. Lastly, the hard maple runners for the bottom drawer are added and screwed in place.
Making and attaching the base
The base frame parts are cut to dimension allowing for through-dovetails on all four corners. After scoring depth lines around the end of each piece with a marking gauge, I lay out the tails on the longer front and back pieces. The tails are again cut using the dovetailed tablesaw blade method. I used a 14° dovetail saw blade to match the 14° sliding dovetails of the drawer dividers.
Once the joinery is finished, I trace the arch pattern on each end of the base frame, cut the curves on the bandsaw, and smooth them. Then I glue-up the base, checking for square. Glue blocks are added to give the case something more substantial to attach to.
You can get the full-size plans for this project at Tom’s website!


Comments
It is a real pleasure to watch a craftsman like Tom McLaughlin plie his trade. It is also an excellent learning experience to watch, learn from, and be inspired by his work.
Thanks for another great video!
Well done Tom and Ben!
Thank you Tom. I enjoy watching your videos.
I really enjoyed watching Tom work. He has a general woodworking philosophy much like mine. I also like that he has a small bandsaw nearly exactly like mine. It's an Inca from Switzerland.
I probably don't think about long term viability of my projects enough. At 76, there isn't a lot of long term left.
I have attached a photo of my buffet which was my first pandemic project. It is nearly 100% curly maple which I really enjoy working with.
Just stunning. Great interview style and I learnt so much. Thanks Tom.
Great video. I love watching Tom. His laugh and upbeat attitude is infectious.
Fabulous! but one question on the glue wiping--wiping before it gels seems to smear it into more of the wood--requiring more sanding/cleanup. I've seen you do this multiple times so it's obviously not a problem....but seems to be for me. Can anyone explain this for me ? thanks
you notice he never wipes with a dry rag/paper towel. by wiping with a wet rag he dilutes it so much that there's nothing left to clog up the pores. i do that too. works for me. i have never had any finishing issues.
Your glue ups appear much more relaxed than when I do them Tom. Seems my planning and prep is lacking.
in a million years i would never trust myself to use a pva glue for a glue up like that. tip of the cap to tom for making it look so effortless. whenever i have umpteen dovetails to glue up, i always reach for epoxy. with a 40 minute open time i can take my time and make sure the joints are seated correctly. epoxy is also a lubricant and it fills spaces (unlike pva). the only downside is cure time. whenever i use epoxy i make sure it's at end of a shop session because i know i will need to give it 12-18 hours before pulling it out of clamps.
Log in or create an account to post a comment.
Sign up Log in