Keeping a tool chest organized
No matter the chest, keep tool spaces simple so it can evolve with your tools and interests.

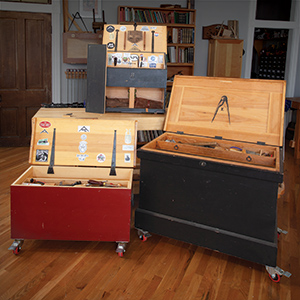
On the whole, I prefer open storage, like trays and spacious compartments, so I rarely make a specialized holder for an individual tool. The fact that the tools touch one another horrifies some woodworkers, but open storage allows you to fit lots of tools in a small space. And they let you easily reorganize based on which tools are the most important at that moment. Just move them to the top tray, like in a traditional English chest, or to the front of the compartment, like in a Dutch tool chest with its open area below. Plus, with traditional trays, your tools are never hidden. No more opening 10 drawers to find the nail set.

Still, I don’t want sharp, delicate edges getting dinged in these open trays. I protect these types of tools using tool rolls or wine cork, or I store them in a rack.
I use two types of racks, one with holes and one with spacers. A simple rack with 1/2-in. holes drilled 1-1/8 in. apart holds and protects awls, screwdrivers, cutting gauges, and dividers without making it hard to reorganize them. A rack set away from the case side with spacers, also called a French rack, works great in a tool chest, allowing you to store tools such as chisels and saws.
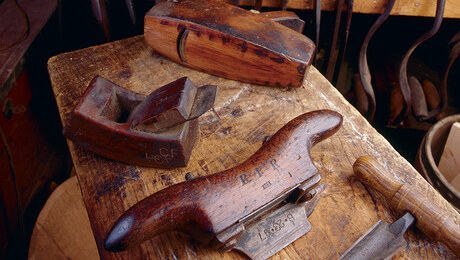
For storing handplanes, most tool chests have an open well. A traditional floor chest is sized so there’s enough space for a good set of bench, joinery, and molding planes. The lower compartment of a standard Dutch tool chest lets you store your molding and joinery planes so you can see their profiles. Note, though, that these areas don’t have dividers or specially fitted compartments. Again, this allows you to reconfigure your tool set without ripping out a bunch of precisely made wooden walls that you constructed right before you bought that new shoulder plane.
Molding planes are usually stored vertically against the back wall of a floor chest with the help of a single divider, which is simply nailed to cleats, making it easily removable. Or the molding planes are stored in a compartment with the toe of the tool facing forward. Either configuration allows you to see the tool’s profile with ease.

For storing larger saws, most people go overboard with custom-fitted holders for the handles. While some saws were stored that way in old chests, I prefer using blocks of wood on the floor of the chest that are kerfed to hold the sawblades.

Divide with discretion
Admittedly, there are times when I do prefer dividers and dedicated tool holders. I make these for tools that I’ll need no matter how my work changes in the future. In my Dutch tool chest, I have built dividers sized for a jack, a jointer, and a smoothing plane—core planes it’s difficult to imagine working without. Still, these dividers are pine scraps pinned together without glue. That makes them easy to pry out and reconfigure should I take up knitting.
Also, sometimes it’s easier to make tool holders out of leather than wood. If you own a utility knife, nail snips, and a hammer you have all the tools you need to rivet together simple leather tool holders. For example, I made a leather pouch for my block plane using scraps from a chair commission and copper rivets from a local store.
From Chris’ article Twenty years with a tool chest in Fine Woodworking #286.






Comments
Nice, thought-prompting article about tool chest organization, the demons surrounding which seems always to be looking to torment me. My only complaint—not enough discussion of some of the evolution of things, and the grimy details that can be so illuminating. (Example: the block plane pouch.)
Query re: sharp tool tip/edge protection: Use of wine corks to protect tips is of course a great, simple, practical means of doing so. Except...what about those of us whose wine always comes from screw-top bottles? I guess we’re supposed to overcome any bias against tool rolls and go that route.... ;-)
Log in or create an account to post a comment.
Sign up Log in