Shopmade tablesaw tenoning jig
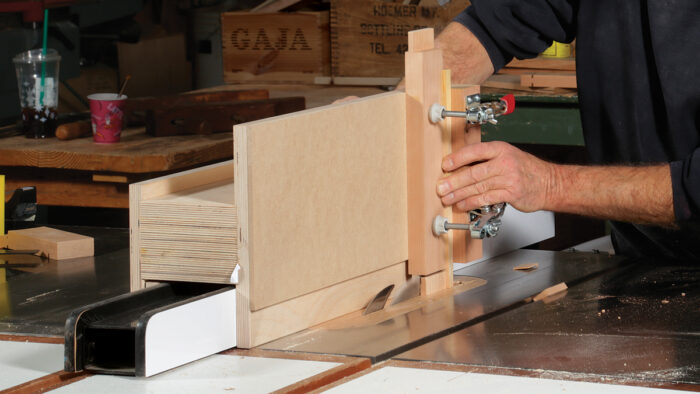
Bob Van Dyke's jig features a thick, laminated plywood bridge that straddles the tablesaw's rip fence, dampening any vibration that could lead to inaccuracy.

Synopsis: This jig cuts all types of tenons equally well, from narrow ones for table aprons to wide ones for breadboard ends to angled ones for chairs. Its main feature is a thick, laminated plywood bridge that straddles the tablesaw’s rip fence, dampening any vibration that could lead to inaccuracy. This bridge allows the jig to be adjustable and to work with the fence on either side of the blade.
I can think of at least half a dozen different ways to make a tenon, and I use them all. Often the best way to cut tenons is at the tablesaw, holding the workpiece vertically in a jig. But I find commercial tenoning jigs, even the old cast-iron monsters, extremely limiting and usually less than accurate.
I prefer this shopmade jig. It is a smaller version of the massive one I learned from my friend Will Neptune. It cuts all types of tenons equally well, from narrow ones for table aprons to wide ones for breadboard ends and angled ones for chairs. The jig’s heart is its bridge, a thick lamination of plywood that straddles the saw’s rip fence. The bridge’s mass helps to dampen any vibration that could lead to inaccurate tenons. Because it straddles the rip fence, the jig is infinitely adjustable, unlike versions that slide in the miter gauge, and its ability to work with the fence on either side of the blade means that the direction your saw’s blade tilts is not an issue.
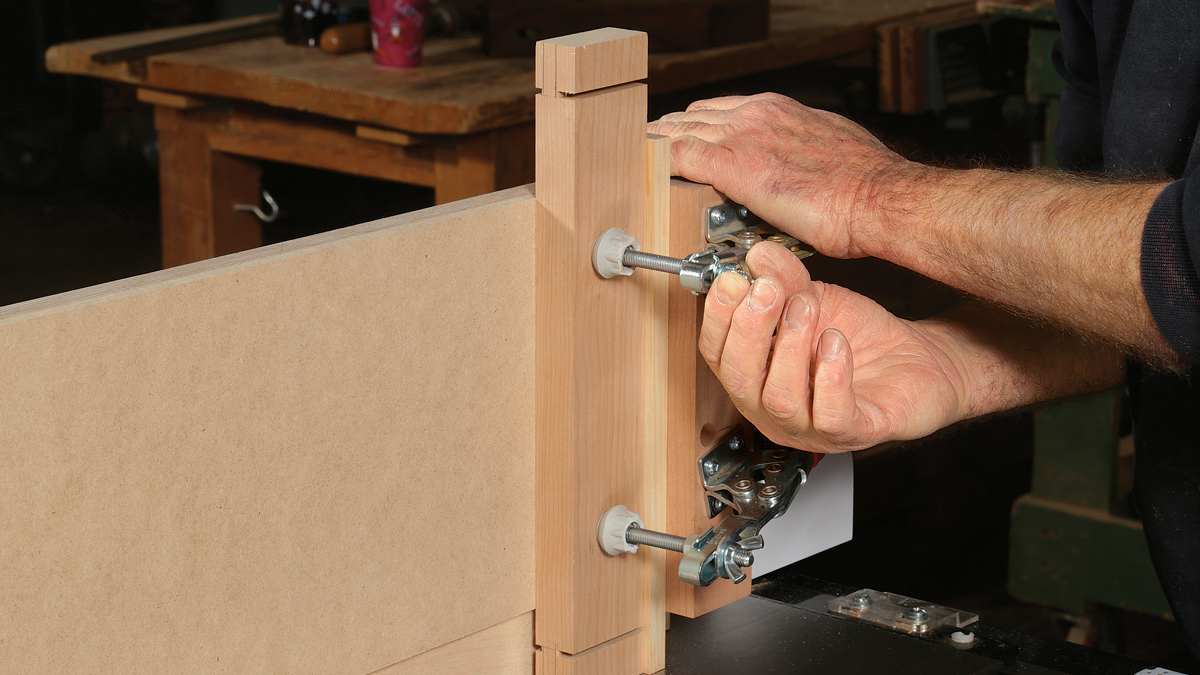
The bridge is housed between two uprights. The tall one sits perfectly square to the saw table and hugs the rip fence. The short upright helps trap the jig on the fence so it travels with zero side-to-side play, a crucial fit. I have a clever way to sneak up on the fit with an adjustable pressure bar after the jig is assembled, letting you easily fit the jig to your particular saw.
Tenon jig shimming
In this video. Bob Van Dyke demonstrates how
he shims his tenon jig to fit any saw.
A carefully built jig makes for accurate tenons
Precision is critical to this build; any inaccuracy in the jig will affect the accuracy of your tenons. So while the jig may look simple, you shouldn’t underestimate the importance of building it well.
The first step is to glue up the five layers of plywood for the horizontal bridge. I used 3⁄4-in. Baltic-birch plywood here, but I’ve used MDF to make this jig before. Both work well. MDF is heavier, but plywood holds screws better, so it’s your call. The finished width of the bridge is the width of your rip fence plus 3⁄4 in. for the phenolic bar, 1⁄4 in. to accommodate the two 1⁄8-in.-deep dadoes in the uprights, and 1⁄16 in. extra for fitting the jig to your saw later.

Make the layers about 3⁄8 in. wider than the finished bridge so there will be plenty of extra width to trim after the glue-up. To bring the glued-up stack to final size, begin by truing one edge of the bridge at the tablesaw. Tack a straight stick to the middle of the stack on one side and reference that against the rip fence. Then reference the cleaned-up edge off the fence to rip the blank to width. If you have a jointer and planer with carbide knives, you can use those too. The plywood will ruin straight knives, though.
 From Fine Woodworking #288
To view the entire article, please click the View PDF button below.


Comments
Does anyone know the source for the rubber tips on the toggle clamps? Everything I've found is too large.
I've purchased toggle clamp spindle assemblies from grainger, mostly to get more length then the ones that came with the clamp assembly.
Thanks.
I was thinking on building the "super-charged rip fence" and it has the same clamp setup -- he says the tips came from the hardware store (see photo caption, p. 59). I did a little poking around and kept being led to cane tips, which seems like they would be way too big.
https://www.finewoodworking.com/membership/pdf/27802/011231056.pdf
I use that rip fence, and love it. I also looked at can tips, and all those I found were way too big. The openings were 3/4 to 1 inch, and outside diameters were over 1-1/4.
I built the same fixture using harbor freight toggle clamps and replaced the stock tips with ones I purchased on ebay but ultimately came from grainger.. google DE-STA-CO Flat Tip Spindle,M8X1.25,0.83,3.27, 507208-M
If you use this jig on a SawStop or Powermatic table saw you could get ultra precise and repeatable cuts by also using the Woodpecker Rip-Flip Fence Stop attachment.
this is yesterday's news, but here is what I ended up with. Going to epoxy a rubber fender washer to "head" (assuming they make those)
https://www.boltdepot.com/Elevator_bolts_Zinc_plated_steel.aspx
As an aside, let me say, I'm happy to live in a world that has a place called "The Bolt Depot", and even happier that it's 5 miles from where I live. There's a whole bolt civilization and culture out there that I wasn't even aware of.
I couldn't find crutch tips that were small enough in diameter.
I got some Everbilt rubber stoppers at HD. Solid rubber, look like corks. I picked up longer 5/16 carriage bolts to replace the stock bolts, drilled a hole halfway through the rubber stopper, and threaded the new bolt on. No glue required.
Works great, and cost about 2 bucks per bolt.
Regarding the wedge to cut angled tenons: Where is it placed vertically? does the bottom edge of the wedge rest on the table?
Thx, Jeff
“[Deleted]”
This is the third tenoning jig I've constructed---and these only after tossing the heavy duty standard iron monster I used for years. The problem with all of them has been the slop or imprecision that rendered them useless for making joints that demand precision on a repetitive basis.
Having recently cut a mess of tenons using Bob's jig, I feel I've finally reached the promised land. I guess I should have expected that from a Van Dyke modification of a Will Neptune jig.
The jig does require care and precision in its build, and Bob points out the critical points in the article. The pressure bar that allows for precise mating of the jig to your rip fence and the great mass of the bridge are what make this so functional and reliable when built with attention to detail.
Like John C2, I found it easy to extend the reach of the toggle clamps (Harbor Freight's $3 versions work fine), adding rubber stoppers from Lowes to the ends of 5/16 threaded rod cut to length, and replacing the outer nut with a wingnut for convenience.
Log in or create an account to post a comment.
Sign up Log in