SketchUp to shop: 18th-century molding
Tim Killen demonstrates how SketchUp helps him shape an 18th-century molding by hand.

I’m working on a reproduction of a Seymour Secretary Bookcase, and as expected there are unique molding shapes requiring handwork. But this handwork can be assisted greatly with a few shallow ripcuts on the tablesaw. These cuts have to be parallel and at precise sawblade heights and distances from the fence. This is where SketchUp fits in: to define the sawcut setup. But first let me show you the parts in the Seymour piece that require this method.
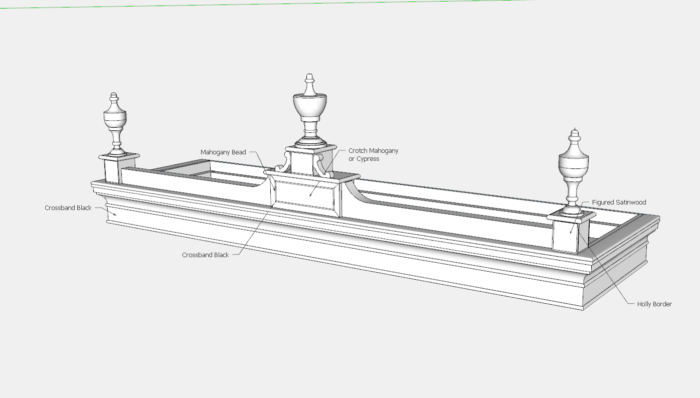
Here is the pediment for the secretary. It’s on top of the bookcase at the very top of the piece. I’ll show you both the assembly and the exploded views.

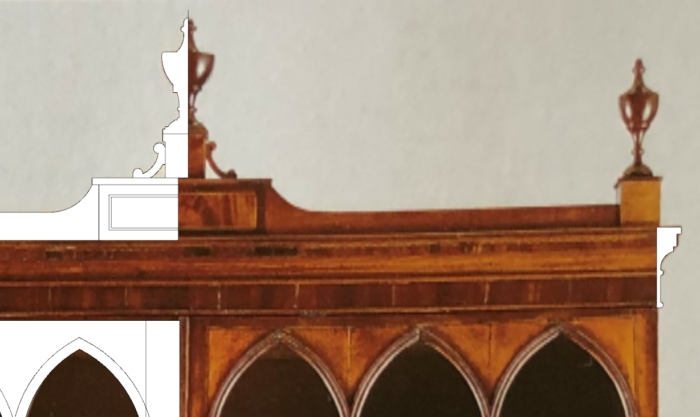
The issue is finding a method to copy the shape of the original 18th-century crown molding. Of course, the first step in SketchUp was to capture the profile shape from an imported photo from the museum. Below, you can see the traced-over white shape at the right end of the photo.
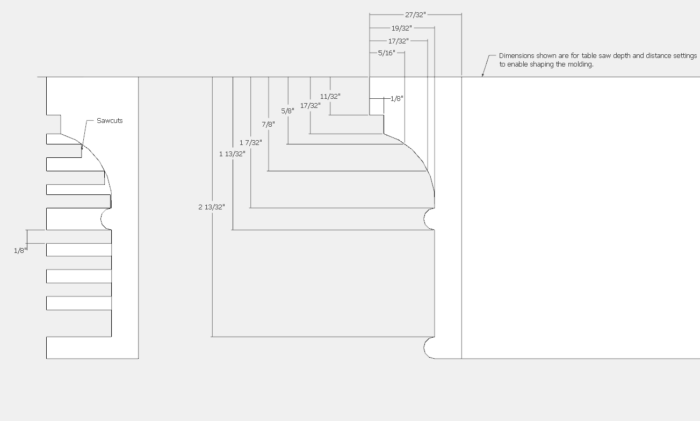
Here is that profile showing dimensions to set the tablesaw.
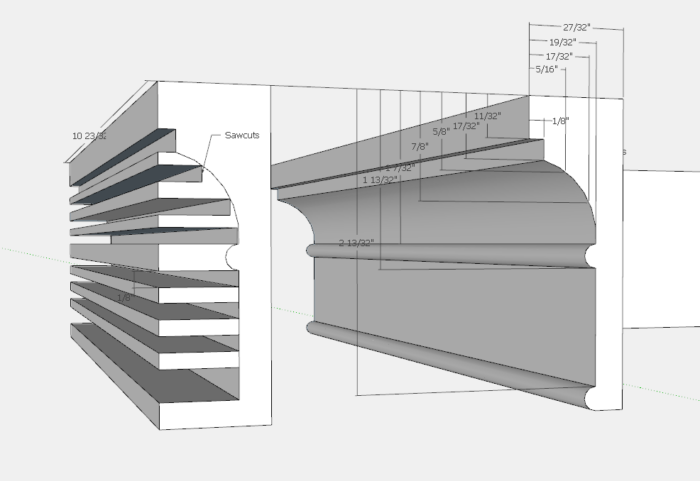
And here is how it looks after ripping those positions and depths.
I’ve created a video, shown below, of the hand-tool work to achieve the final shaping.
And here is a photo of the shop work on the pediment assembly.

Tim
KillenWOOD








Comments
Tim,
Thanks for sharing the video. Good to see how machine tools, hand tools and SketchUp can work together in the shop to achieve a result. The pediment looks amazing. Please continue to post your progress.
Mortimer_Tenon
Log in or create an account to post a comment.
Sign up Log in