SketchUp to shop: Coopered container
In this video, SketchUp guru Tim Killen uses the scale tool in an interesting way on this coopered container.
For the past 15 years, I’ve attended the annual Williamsburg Conference “Working Wood in the 18th Century”. Each year, I’ve come home with new ideas for furniture projects. This year the conference was held remotely, so it hindered my capability to capture new ideas. However, I did see a Williamsburg video of the Cooper’s Shop that caught my eye. In a corner of the shop there was an elliptical chest that I had not seen before. I instantly decided to develop the model in SketchUp and hopefully build the chest. Here is a photo of that chest on the Cooper’s shop floor.

Step 1: I started the modeling by creating a circle of 12″ diameter. However, I did not use the 24 side default, rather changed the number of sides to 20. This was done to match-up with the number of Staves in the Container.

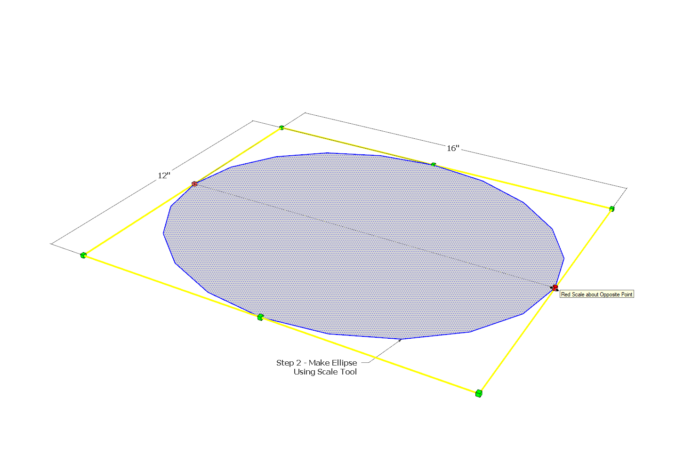
Step 2: I used the Scale Tool to make the circle an ellipse. I needed a dimension of 12″ by 16″. I held down the Cntrl Key (Option on Mac) so that the scaling was down around the centerpoint.
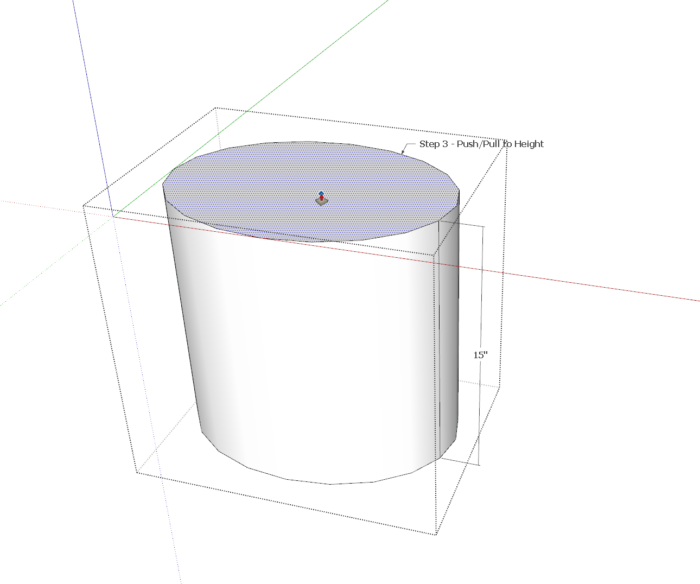
Step 3: I used the PushPull Tool to give the ellipse a height of 15 inches.
Step 4: Then I made the tapering from bottom to top. Again this was done using the Scale Tool on the bottom face.

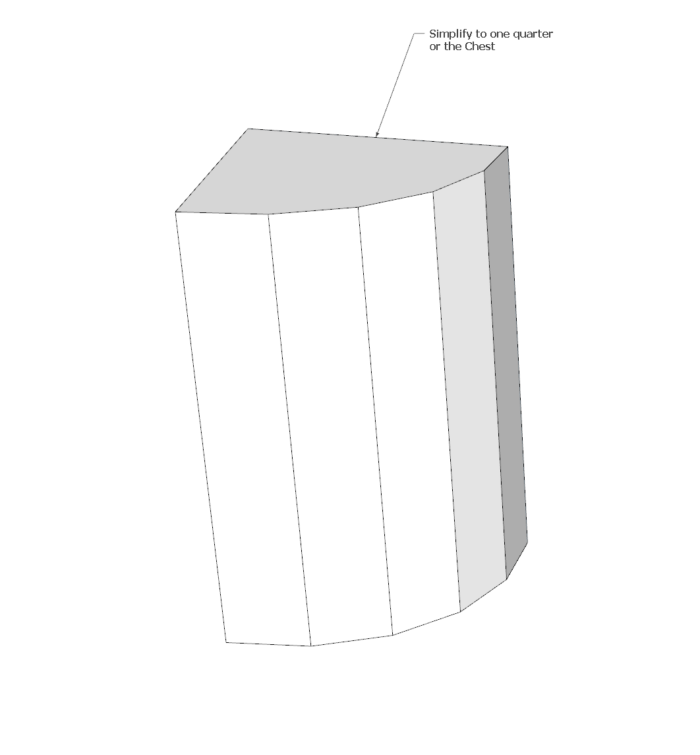
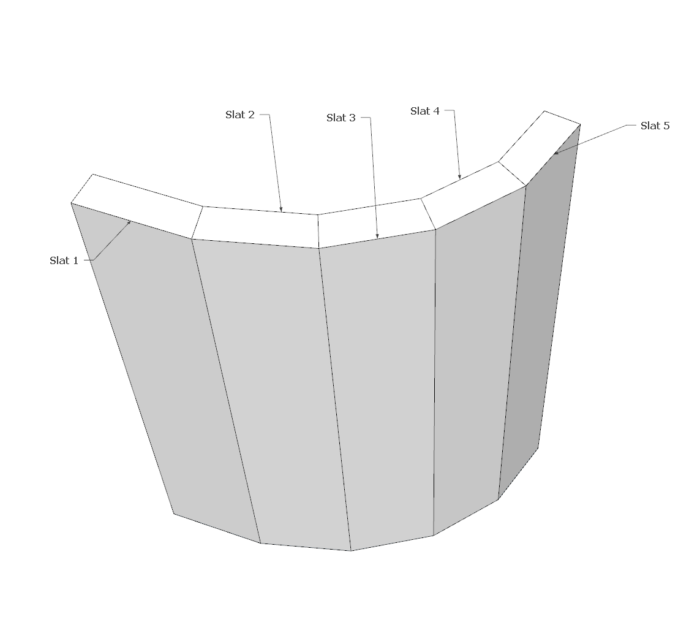
Step 5: I drew vertical lines to show the outer edges of the staves, and simplified to a quarter of the container. Because of symmetry, a quarter design will cover all details for the complete container.
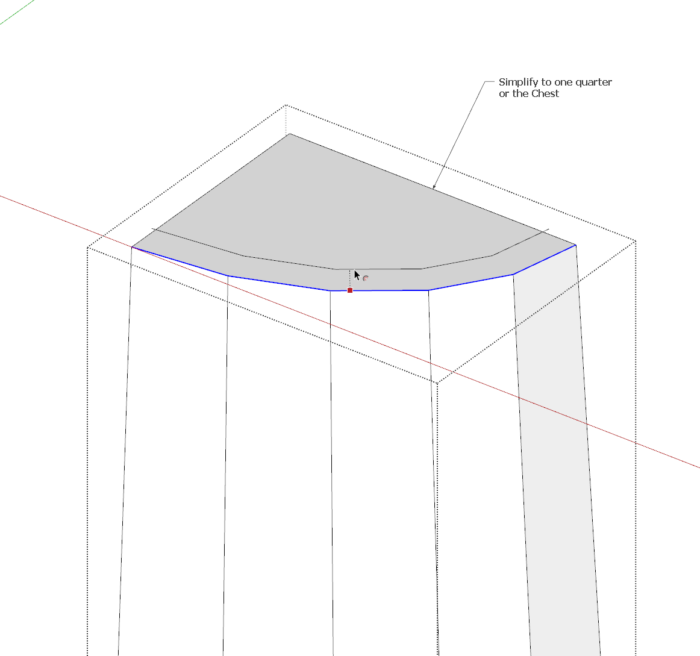
Step 6: I needed to define the Slats and make the 3/4-in. thickness. I used the Offset Tool to define the location of the inner face of the slats.
Step 7: I created five components, one each for the five staves.
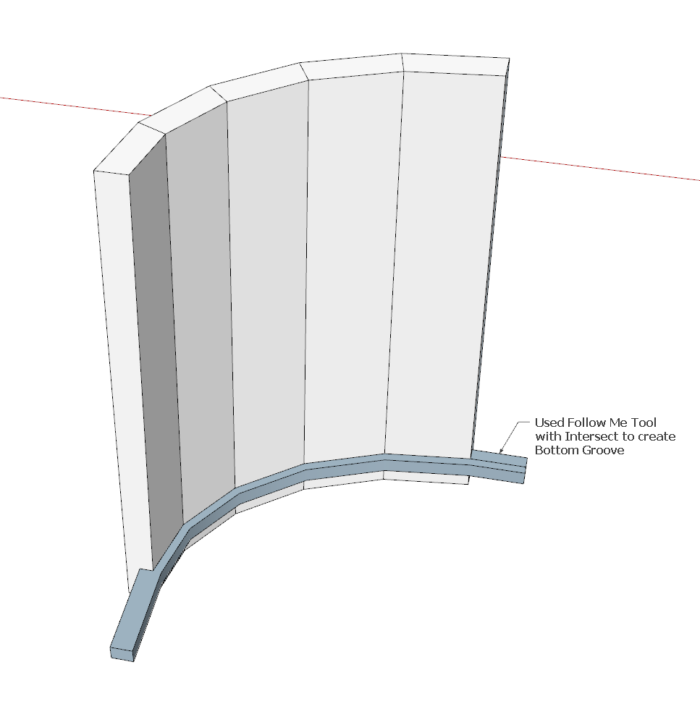
Step 8: The inner face of the Slats or staves need to be grooved for the Bottom of the Container. I created a rectangular profile for the groove shape and used the Follow Me to show that groove in each Slat. Then performed an Intersect for each of the slat components.
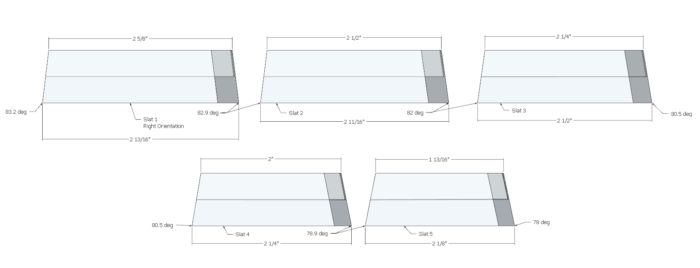
I created Top View and Parallel Projection for each Slat. These will be used to make full size templates of both the top and bottom faces of the slat ends. These templates will be used to scribe the detailed shape and angles of each end. I also flipped these templates to make those used on the reverse positioned quarters. The edge angles will be created with hand planes.
Here I’ve roughed out the 20 staves in redwood held together with tape.

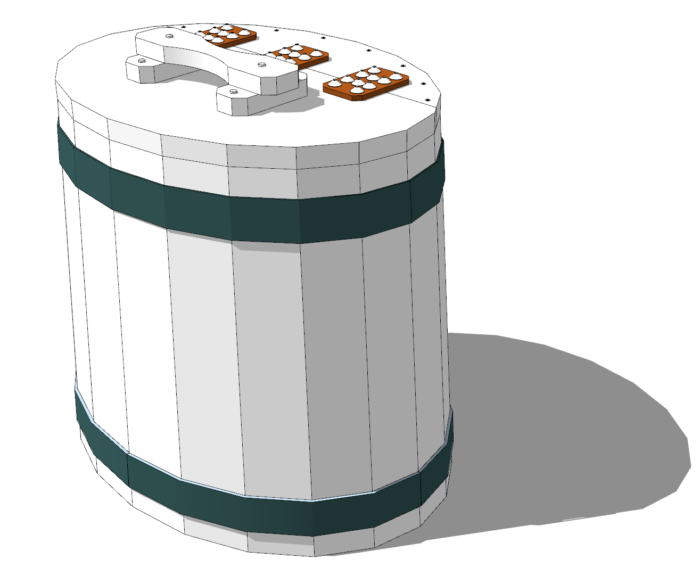
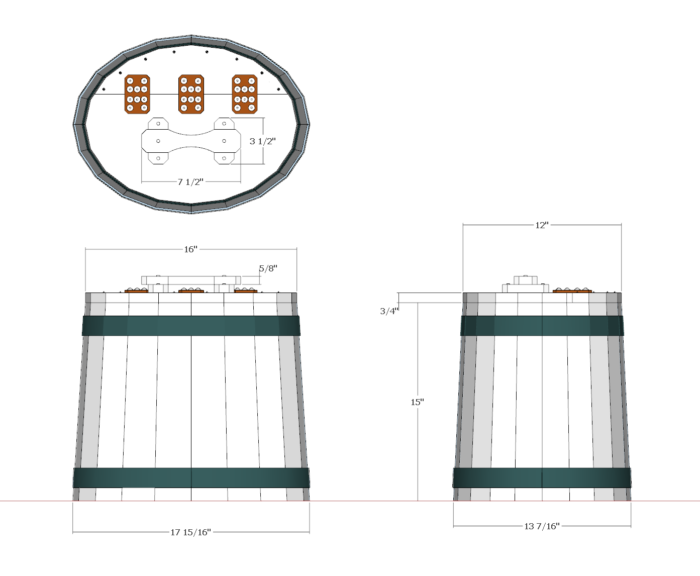
Here is the composite of the SketchUp model. The Top is hinged with thick leather, and fitted with a robust handle.
And here are the dimensioned orthographic views.
Credits:
Ramona Vogel Hill of Williamsburg, a Cooper, was the presenter of the video. Her presentation was excellent and motivated me to build the Container.
Jonathan Hallman, Master Cooper, Williamsburg, provided sizing dimensions of the Container. He also explained processes used for making the Hoops.
Jim Borland of Michigan, initiated my interest in this piece by sending an email with questions about angles and use of SketchUp. He pointed me to the Williamsburg video in the Cooper’s shop.
Tim
KillenWOOD









Log in or create an account to post a comment.
Sign up Log in