Workshop Tip: Guide Pin Lets You Bandsaw and Rout Curves with the Same Jig

Click here to enlarge illustration.
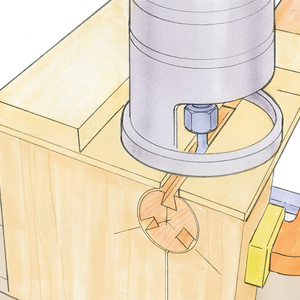
When shaping curves on table legs or rails, you can use a bearing-guided straight bit and a pattern-routing jig at the router table. Before you use the router table, however, you need to trim away a lot of the waste. The usual method is to trace a line and then make a freehand cut on the bandsaw, leaving an even 1⁄16 in. or so to trim with the router. But when bandsawing, it’s all too easy to cut past the line—or stray too far from it, leaving too much waste for a smooth router cut.

To make the sawing as fast and foolproof as the routing, I place a 1/4-in.-dia. pin ahead of the bandsaw blade for the jig to ride against, locating the pin so its edge is offset 1/16 in. from the blade’s path. To hold the little pin, I add an auxiliary table. That also creates a larger support surface for my large pattern jigs. I use a 1/4-in. metal roll pin—also called a spring pin—that is generally used to secure machine pulleys. With the pin in place, I can zip off the waste on the bandsaw, leaving just enough wood for a smooth, burn-free cut on the router table. The part never leaves the jig, and the process takes less than a minute.
—DEAN HEDSTROM, St. Paul, Minn.
Illustrations by Dan Thornton
From Fine Woodworking issue #277


Comments
It is a great idea and thank you for sharing it. I wonder if a maple or hard plastic pin would be strong enough to do the job but would save the blade and the lower guide if the auxiliary table moved allowing the blade to contact the pin.
Log in or create an account to post a comment.
Sign up Log in