French Polishing: Filling the Pores, Part 1
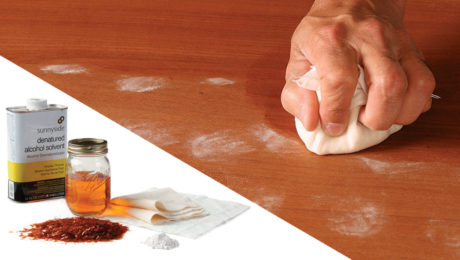
The initial step in French polishing, called the first polish, is filling the open pores of the wood with shellac, pumice, and good old fashioned elbow grease.
Start your 14-day FREE trial to watch this video
Plus, access more than 500 video workshop episodes when you become a member
Links John mentions in this video:
 | A True French PolishBy George Frank
|
Kremer PigmentsThis is John’s source for the pigments and pumice he uses in his french polishing. |
Videos in the Series
-
What is French Polishing?
November 12, 2019
-
French Polishing: Filling the Pores, Part 1
November 19, 2019
-
French Polishing: Filling the Pores, Part 2
November 19, 2019
-
French Polishing: Filling the Pores, Part 3
November 19, 2019
-
French Polishing: How to Build Up the Finish
November 26, 2019
-
French Polishing: How to Tackle Carved Details
December 4, 2019


Comments
Beautiful series! I very often use shellac and polishing, but without using pomice usually. This really opened my eyes on the different grain and the topic of filling the open pores.
I will be having a much more sistematic approach to french polishing now!
Pumice isn’t the only grain filler. You can use Plaster of Paris, although the pigments or dyes you use to color it can fade and the plaster turns back to white over time. There are also commercial grain-fillers that pack well and aren’t as abrasive. The problem with pumice is that as you grain-fill with it, it creates sanding dust which redistributes around the surface and mutes the color variations in the wood, making it look somewhat lifeless. Also, some species shouldn’t be French polished, oak and ash mainly, because they’re too open-grained for it. Walnut is one of the best for French polishing.
While there are many materials that can be used as grain filler, the process I describe uses pumice. I have not found my method mutes the colors in the wood. I would have changed methods a long time ago if it did. The usual comment is the opposite, how alive the wood now looks. There are woods that need no filler (cherry, maple) and French polishing is applied as described in the "bodying up" part. I haven't found a specie that doesn't look good in French polish, even oak!
To Ben's query about format of the series: I like the half hour segments. It is a lot of information to absorb, and I like the break to process it and watch more later. Frankly, John talks so fast and covers so many things that it is exhausting and I needed the break.
It is a great series and has inspired me to try more FP and shellac techniques in my own work.
Thank you! This is the type of feedback that helps us make better videos!
Very helpful video. I'm in the process of building a Chippendale style serpentine chest from curly maple--it is, by far, the most ambitious project I've ever tackled. I'm planning on French polish as finish, but am wondering if you have a suggestion to make the grain really "pop". Also, I think breaking the videos down into parts as you've done is far more user friendly than a single 1 1/2 to 2 hour video would have been.
GSDAD: Shellac by itself will do a wonderful job making the maple "pop". French polishing maple will go quickly as there is no grain filling to speak of. Avoid using pumice. Stains will also make maple "pop". Oil based or water based dyes will work as will just plain oil. And since maple is pretty white at first and takes a long time to acquire that beautiful orange, many finishers color it. When I have done that, I have used water dye and experimented with just the color I was after. The one caution is that the surfaces really must be prepared well as the dye will absorb more in rough patches than smooth. Failure to completely remove machine planer marks will result in a rather ugly surface. Because there is some compression in the wood, hand sanding may not completely remove those marks. I use a hand plane to resurface any machine planed wood and usually leave it at that. Since it is curly, you have your work cut out to avoid tear-out though any inspection of 18th C. curly maple work will often show some tear-out and it doesn't destroy the appeal of the curly maple. I often use a raw umber glaze in the crevices to accent the moldings. Makes it look 200 years old! This is done after most of the French polishing is done. Future video? Ben?
Fantastic content! John is an asset and it is wonderful to have his knowledge recorded like this. I was also absolutely delighted to hear him talking about conservation principles so clearly and casually.
It is always great to see different preferences and practices. John's method mirrors my own understanding, but I learned a lot watching these videos, so I am very grateful. Thank you both!
Ethanol - CH3CH2OH or C2H6O.
The boiling point of methanol is 65°C. The boiling point of ethanol is 78°C. Boiling and evaporation are not the same, but boiling points are a good proxy for relative vapor pressures. BTW, the boiling point of acetone is 56°C (at room temperature you can watch a film evaporate in seconds).
Sorry to get technical, but I am a chemist.
Great videos. Thank you.
Thanks BKOhta. I knew something was wrong with the ethanol formula but it wasn't on the tip of my tongue. C2H5OH was what I was looking for. I like this formula as it shows the hydroxyl group as well as the number of carbons in the carbon chain. I'll defer to the chemist. Technical is Good!
Log in or become a member to post a comment.
Sign up Log in